Overview[]
Following up on the Interior Maps Tutorial, we'll be breaking down how to create Exterior Maps. It is highly recommended to go through the Interior Maps Tutorial first if you are new to the editor as it goes over basic object manipulation.
This guide will go over the following:
- Creating a building
- Working on the Y-Axis
- Staggering Structures
- Streets
Video[]
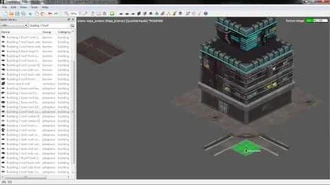
Shadowrun Returns Editor Exterior Maps Tutorial
Picking Your Pieces[]
What kind of building do you want to make? Something run down and slummy like the tenements? Something more fancy like an old building in Pike Place? Usually a building set will come in three basic parts:
- The Base
- Edge Pieces
- The Roof
Depending on what kind of building you want, most base pieces will be 3x3 high. Fancier buildings such as the ones in Pike Place Market may have bases that are 5 or 6 units high. This is to help create the illusion that more well funded places appear more grand in scale. Most edge pieces will be 3x2 units high. Some may be 3x3, depending on which set you choose to use. The roof is composed of a front and back corner piece, side corner pieces, a mid piece, and front and back edge pieces. This will be covered in depth later on in the guide. Since most of the tile set is modular, you can mix and match different tiles from different buildings.
The following tiles will make up the base and face of the building:
Group: Barrens[]
Base[]
- Building 1 Base 01
- Building 1 Base Beveled Back 01
- Building 1 Base Door 01
- Building 1 Base Front Corner
Edges[]
- Building 1 Edge Three Lit Windows
- Building 1 Edge Window's End Dark
- Building 1 Edge 1 Electronic Box
- Building 1 Edge Window's End
- Building 1 Edge Corner One Darkened
- Building 1 Edge Single Lit Window
- Building 1 Edge Back Corner Plain
- Building 1 Edge Back Corner Ruined
- Building 1 Edge Front Corner Dark
- Building 1 Edge Front Corner Blue
Building a Foundation[]
Start off by dragging your four base pieces into the Scene. Notice that the Base Door 01 and Base 01 are your filler pieces for the base of the building. These are capped off at the end by the Beveled Back 01 piece and joined together by the Front Corner piece.
(Insert Image First Four Pieces)
Once you've laid out the base of your building you will end up with something close to this:
(Insert Image Complete Building Base)
Going Vertical[]
If you haven't already, drag out your building edges and we can start putting some walls on this structure.
(Insert Image Edge Graveyard)
Select an edge piece, we'll be using Back Corner Ruined. For exterior buildings, in order for tiles to sort and be lit properly, we have to place the pieces properly. Your first intuition might be to drag and place the edge piece similarly to this:
(Insert Image Bad Edge Example)
Notice the grid below the tile when it's selected. It is actually placed quite a ways away from the wall it's supposed to be above. Instead we place the tile to match the grid of the wall below it, similar to this:
(Insert Image Matching Edge Grid)
From here, press Page Up to move the tile on its Y axis. Nudge it into place until it fits snug above the buildings base like so:
(Insert Image Snug Edge)
Again, you can select each tile to see it's grid position, if they match, you've done it! This can also be observed from the Property View. If done properly, the two tiles will have the same X and Z coordinate, but a different Y coordinate.
(Insert Image Property Edge)
Finish up the second story and repeat this process for each story you wish to add to a building.
(Insert Image Three Story Building)
Topping it Off[]
Putting the roof together will follow a similar process to placing the edges. We'll be using the following pieces for our roof.
Group: Pikeplace[]
Roof[]
- Building 2 Roof Back Corner
- Building 2 Roof Back Side
- Building 2 Roof Side Corner
- Building 2 Roof Center 01
- Building 2 Roof Front Side
- Building 2 Roof Front Corner
(Insert Image Roof Graveyard)
Starting with the Roof Front Corner, match it to the grid of the Base Front Corner tile.
(Insert Image Roof Base Corner)
With the tile selected, Page Up, until it fits atop the edge.
(Insert Image Roof Corner In Place)
Repeat this process for the rest of the roof tiles. Since you have the Roof Front Corner in place, an alternative is available. You can copy the Y coordinate from the Roof Front Corner and apply it to the Y coordinate to the rest of the roof pieces on this level.
(Insert Image Property Compare)
(Insert Image Complete Roof)
Staggering Levels[]
We've made a great looking box up until this point, but if all your buildings were likes this the game would feel pretty bland after awhile. A quick way to customize your building is to add a staggered floor to it. Using either the previously used tiles or another set, we'll add another level to this building.
Group: Pikeplace[]
Roof[]
- Building 2 Edge Back Corner 2
- Building 2 Edge Corner
- Building 2 Blue Window
Take your Edge Corner and match it to the Base Front Corner one more time. Page Up until it is snug on the roof. Then drag the tile back to where you want the next floors corner to be.
(Insert Image Stagger Corner)
Repeat the setup for the Edge Back Corner 2 and Blue Window. Be sure to check match the grid and Y coordinate properly.
(Insert Image Stagger Edges)
Follow the steps outlined for the first roof and there you have it. A building with a staggered floor!
(Insert Image Complete Stagger Building)
Street Level[]
We're going to bring it down a level now. Your building is all good but how is anyone supposed to get to it? It's sitting in the middle of a grey void with no hope of being found. Fortunately, laying down some streets is a pretty simple task when compared with building construction. We'll be using the following tiles:
- Sidewalk Dark Grey 1
- Sidewalk Dark Grey 2
- Sidewalk Broken
- Two Lane road Double Yellow Line 1
- Sidewalk Corner
- Crosswalk Top Bot
- Crosswalk Side
- Cobblestone
(Insert Image Street Graveyard)
(Insert Image Complete Street)
Props[]
With the streets out of the way, we can start adding some decorations. There are many Props available for this purpose that can help create unique environments. By this point you should have a pretty good handle on the grid and coordinate system for placing things properly. Here is a list of Props that would help liven up this scene.
- Billboard Simsense
- Sign 29
- Sign 48
- Westside Warlockx graffiti
- Wall Monitor large blue
- Tech Panel plain
- Wall Pipe tangled
- Generic Graffiti 04
- Overhead Walkway
- Overhead Walkway Pillar
- Weponz Van
- Tech Display 2
This is just a short list of what can be found in the asset library for this purpose. Have some fun, get creative, and go to town on the environment.
(Insert Image Prop Graveyard)
(Insert Image Complete Props)